Multi Camera Podcast Setup: Cameras, Audio and Lighting
You've got a guest booked, a table that finally looks decent on camera, and three tabs open comparing camera bodies you hadn't planned to buy. One angle feels flat. Four angles feel like a television studio you don't have staff to run. And underneath the gear question sits a harder one. Will one more camera give you a better episode, or just more cards to sync, more hours in post, and more ways for a good conversation to drift out of alignment?
That's where a multi camera podcast setup earns its keep or becomes debt. I'd design it listener first. Define an audio-safe edit, meaning the episode still makes sense to someone who's only glancing at the screen, before you add a single camera change. Then count the derivative clips each extra angle provides before you buy gear. If an angle can't name the moment it fixes, it doesn't belong in the room.
Table of Contents
- How Many Cameras Your Show Actually Needs
- Camera Positions, Lenses and Framing for Each Shot
- How to Sync Every Camera to One Timeline
- Audio Setup That Keeps Every Voice Clean
- Lighting Your Hosts and Guests Consistently
- Recording Day Checklist and Test Run
- Choose Your Editing Route Before You Hit Record
How Many Cameras Your Show Actually Needs
A two-person interview has a clear limit: two close-ups cover the speakers, while a wide can preserve the conversation as a fallback. The right count depends on what the edit needs to show, not on how many camera inputs are available.
| Show format | Cameras | Angles | When it pays off |
|---|---|---|---|
| Solo host or seated two-person interview | 2 | Host close-up and guest close-up | Audio-first shows with low sync risk |
| Host with two guests | 3 | Wide master, host close-up, guest close-up | Covers reactions and turn-taking |
| Panel or product demo | 4 | Wide, two singles, detail camera for whiteboard or product | Frequent interruptions, demos, and shared screens |
| Studio with live audience | 4 or more | Wide, multiple singles, audience and reaction coverage | Only with an operator, a sync plan, and a shooting schedule |
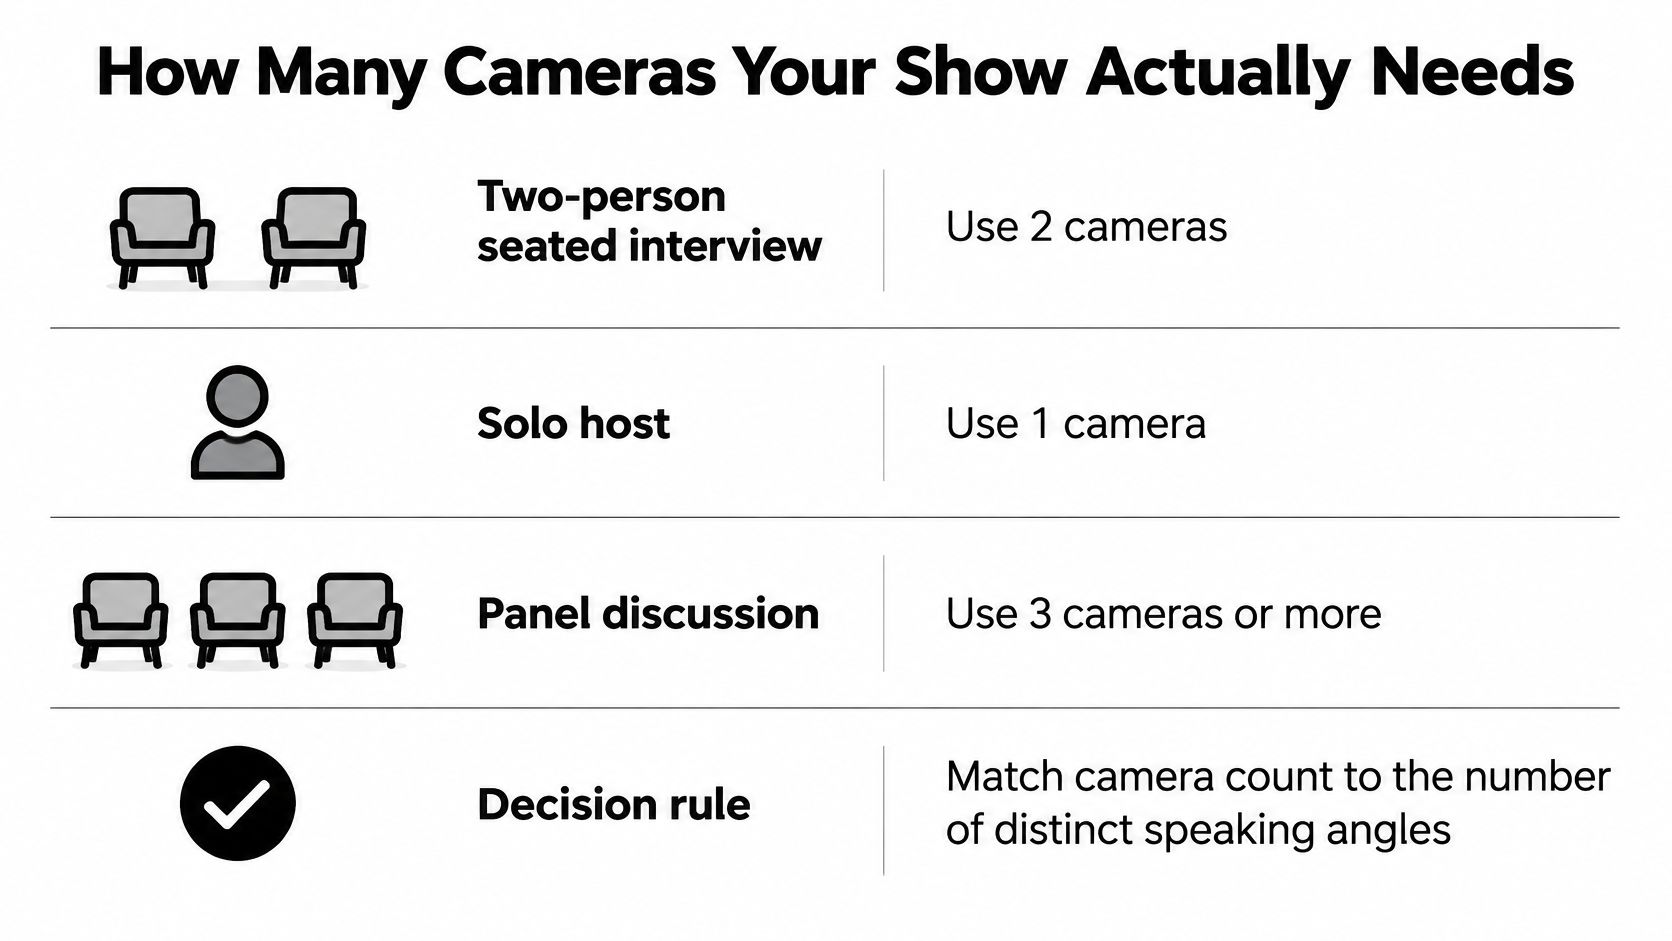
Match camera count to the distinct speaking angles your format creates. A seated two-person interview has two singles; add a wide only if you need a continuous fallback. A founder demo with a whiteboard, a product on the table, and guests talking over each other may benefit from a fourth angle.
Video deserves investment when it serves the viewing experience. In Q1 2026 data summarized by Adopter Media's podcast listening statistics, YouTube became the most-used podcast service among U.S. weekly consumers at 37%, up from 31% two years earlier, while Spotify fell from 28% to 21%. That supports making video for screens, but it does not mean every show needs another camera.
Count asset yield before you count cameras
Start with the outputs one episode needs. Then assign each a camera angle.
- Full episode: use the wide and the singles the format needs.
- Clips and vertical shorts: use tight singles that hold up in a crop.
- Thumbnails and brand footage: capture expressive faces; a new camera position may not be necessary.
Most shows should order four to six clips per episode. Strong interview episodes may support more, while quieter solo episodes may support only two or three. If a fourth camera does not give the edit a useful new angle for those clips, it adds complexity without adding much value.
Run the three-moment test before adding a camera. Name three moments in a typical episode that another angle would improve: a guest reaction while the host speaks, hands demonstrating a product, or a wide shot covering a fast interruption. If you cannot name three, keep the setup simpler and prioritize clean audio and consistent lighting.
Practical rule: Add a camera only when its useful moments justify the extra syncing, storage, editing, and reshoot risk.
Solo and two-person shows often work with two cameras. Host-with-guests formats commonly need three angles, while panels and demos justify four when each camera has a clear job and someone can manage it.
Camera Positions, Lenses and Framing for Each Shot
Position each camera for the job it owns, then lock it. These starting points work for a host and two guests around a table.
| Shot | Position | Lens (35mm equivalent) | Purpose |
|---|---|---|---|
| Wide master | 2.5 to 3.5 metres back, centred, at eye height | 35-50 mm | Continuity and vertical crop safety |
| Host close-up | 1.5 to 2 metres away, 20 to 30 degrees off the speaker's axis | 50-85 mm | Eye contact and expression |
| Guest close-up | Mirror of host position on the other side | 50-85 mm | Reactions, gestures and listening |
| Detail or reaction | 1-3 m, aimed at whiteboard, product or hands | 35-70 mm | Cutaways that clarify the point |
The longer lenses on singles compress the background, separate faces from the set, and keep features natural at close range. Go wider than 50 mm for a close-up and noses stretch toward the lens. The wide stays wider and safer, because its job is context, not intimacy.
Framing rules that survive the crop
Keep eyes in the upper third of frame and leave modest headroom above hair. That placement gives a vertical crop from a widescreen frame room to keep both the head and gesturing hands. If you frame tight for YouTube and chop the sides later, shorts will cut off chins, foreheads, or the product someone's holding.
Mirror the close-ups so each speaker holds a consistent eyeline across cuts. The host looks frame right, guests look frame left, and nobody appears to stare past their conversation partner after you cut. Matching shot size matters just as much. When one single is chest-up and the other is a tight head shot, every cut feels like a jump even when the audio is smooth.
Height changes break this faster than any lens choice. Seating, risers, and camera height need adjusting before you touch focus, which is covered in our guide to framing guests of different heights. Check both singles side by side on a monitor. If one person towers over the other in frame, fix the chair or the tripod, not the crop.
Build the audio-safe edit first
Design for two audiences at once. In Edison Research's Podcast Consumer 2026, 78% of U.S. weekly podcast consumers watched video podcasts while 80% still listened to audio-only podcasts. Video hasn't replaced listening, so your edit can't depend on constant visual attention.
Write down what the listener needs at each moment first. Then add a cut only when it does one of four things.
- Clarifies emotion: a reaction that changes how a line lands.
- Demonstrates something: hands, a screen, or a product the words refer to.
- Resets attention: a wide after a long single during a new topic.
- Supports a short: a clean single that can stand alone vertically.
Cutting on every speaker change fails this test. It creates a restless episode that's harder to follow for someone cooking, driving, or watching in bursts. Hold a shot through a short interruption instead, and let the wide carry fast back-and-forth exchanges.
If a cut doesn't add meaning a listener would miss, don't make the cut.
Keep that wide master locked for the whole session. It's your continuity insurance. When a close-up drifts, a guest leans out of frame, or a camera stops, the wide lets the editor keep the conversation intact without inventing coverage you never shot.
How to Sync Every Camera to One Timeline
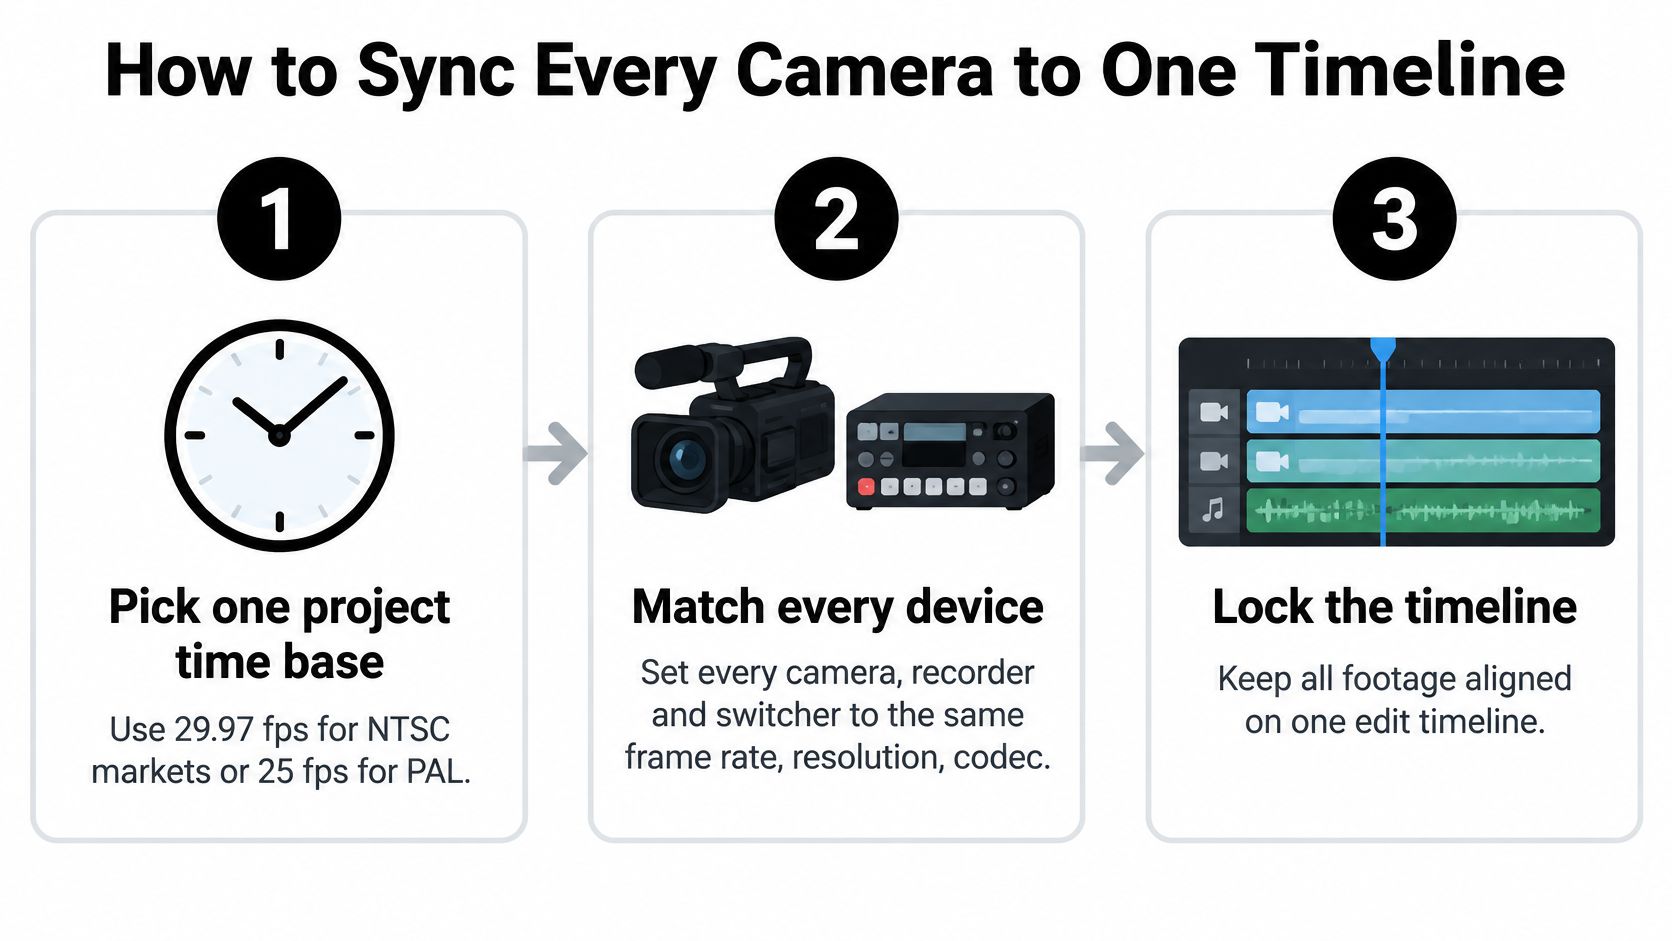
Waveform matching in your editor is a rescue tool, not a sync strategy. Build sync into the recording day as a routine you can repeat when you're tired, rushed, or swapping batteries between guests.
The six-step sync routine
- Pick one project time base. Use 29.97 fps for NTSC markets or 25 fps for PAL markets, following the approach in Frame.io's timecode workflow guide, and set every camera, recorder, and switcher to the same frame rate, resolution, codec, and colour space.
- Jam every device from one timecode source. A shared source means each file carries the same clock, so your editor lines up numbers instead of guessing from audio peaks.
- Distribute genlock where cameras support it. Genlock locks sensor timing to one reference, which prevents cameras from slowly drifting apart during a long recording.
- Record a visible and audible slate or clap at the start of every camera. It's your backup marker and your quickest visual proof that files belong together.
- Run a 60 to 90 minute endurance test. Record your longest realistic episode length, then clap again at the end.
- Compare the final clap against timecode and inspect for dropped frames. If the end marker still lands where it should, your system passes.
Don't shorten step five because the first five minutes look fine. Drift is cumulative. A mismatch that's invisible at minute eight can cost you an editor's afternoon at minute seventy.
The pitfalls that create cumulative errors
The fastest way to break a timeline is mixing frame rates. Putting 23.976, 24, 25, 29.97, and 30 fps material into one project, or mixing drop-frame and non-drop-frame timecode, creates timing errors that grow with episode length. Your editor then spends the session nudging clips instead of editing the conversation.
Rental cameras and borrowed bodies cause most of these mismatches. They arrive set to whatever the last shooter needed. Check the menu yourself, every time, even when the camera is yours and you set it last week. One firmware reset or a guest operator's helpful tweak is enough.
Pass or fail test: identical frame-rate settings, matching timecode, a clean start marker, and no measurable drift at the end of the longest planned episode. Miss one and you don't have sync yet.
Some cameras can't accept genlock. That's workable, but treat that body as a higher-risk source. Feed it external timecode, record continuous reference audio on every device so waveforms can rescue you, and test that specific camera before every recording rather than trusting last week's result. I would also never make the risky camera your only close-up of the guest. Put risk on the detail angle, where a dropped or drifting file hurts least.
Write the agreed settings on tape and stick it to the switcher or recorder. Frame rate, resolution, codec, colour space, timecode mode. When something gets reset mid-day, the person in the room can restore the standard without calling you.
Audio Setup That Keeps Every Voice Clean
Engineer audio independently of camera count. Viewers forgive a soft angle or a slightly wide framing. They don't forgive one voice that's loud, the next that's buried, and laughter that clips.
One close microphone per speaker
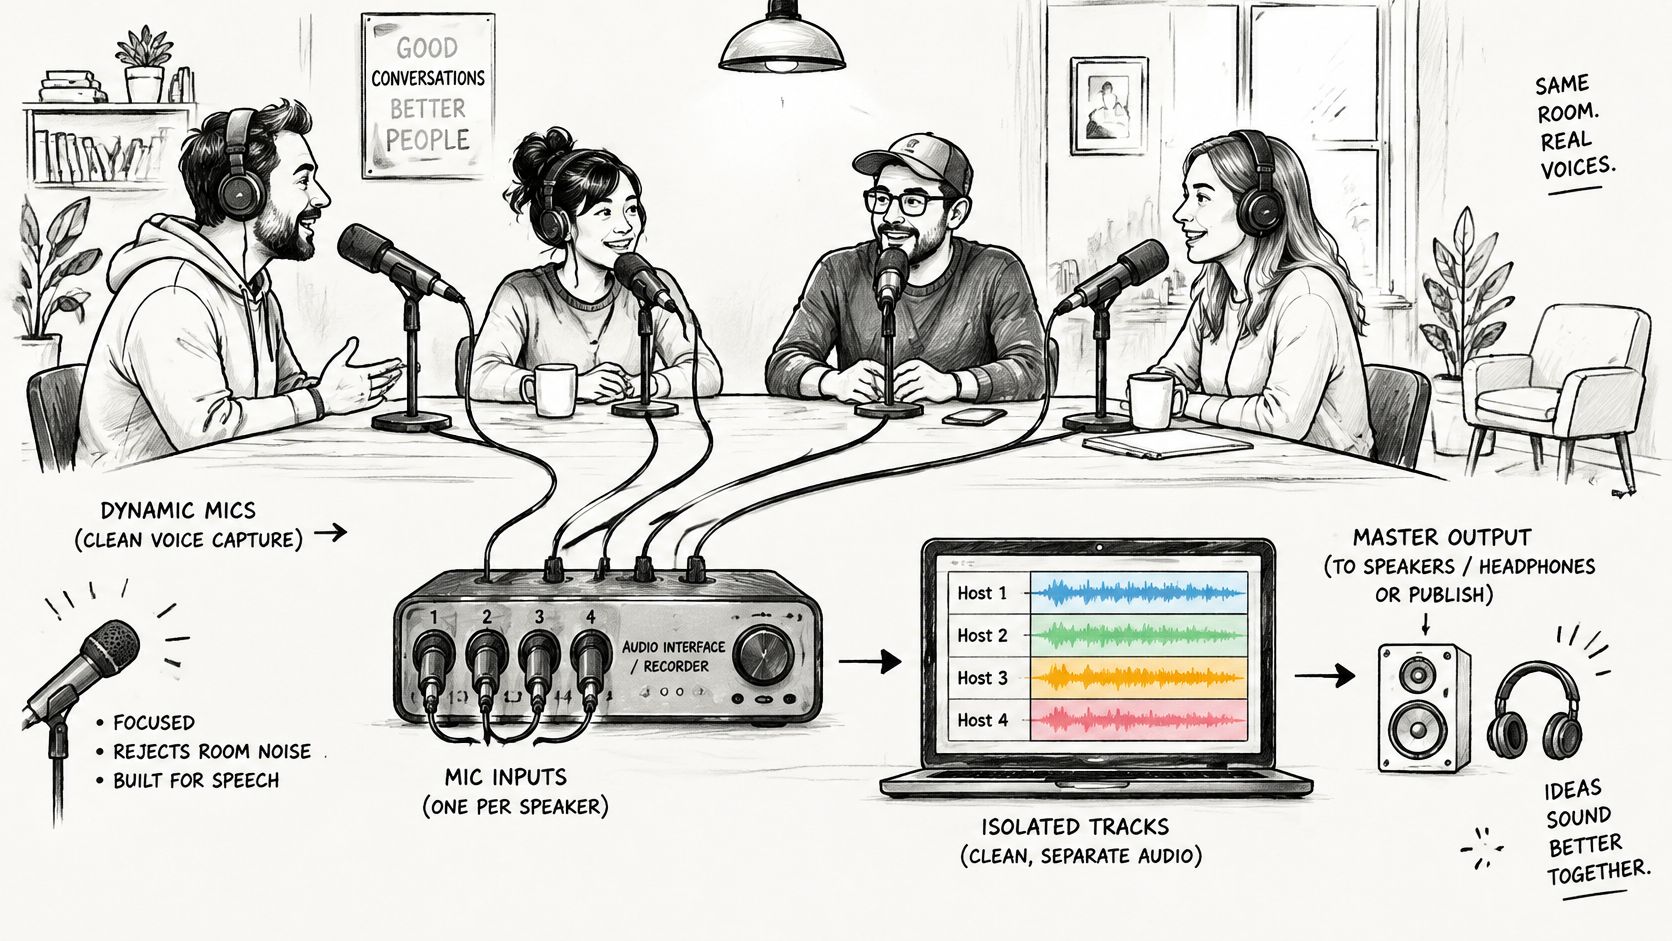
Give every participant a dedicated close microphone, preferably a dynamic broadcast microphone in an untreated room, because dynamics reject more of the room than condensers do. Record each person as an isolated track into a recorder or interface at 24-bit resolution or higher.
Mic choice and placement do more than any plugin, so work through our podcast microphone guide before you buy a second camera. Position each mic close enough that the speaker doesn't have to project. Distance is where room echo, traffic, and air conditioning enter the recording, and no editor can fully remove them later.
Gain staging that leaves headroom
Set conservative input gain so normal speech peaks around -12 to -6 dBFS. That headroom is what saves you when a guest laughs, leans in, or lands an emphatic point. Never use automatic gain control on the primary recording, because it pumps the room noise up during pauses and flattens the moments that matter.
During the sound check, have each speaker talk at normal volume and then at their loudest expected volume. Monitor on headphones for four things.
- Clipping: peaks hitting the ceiling on loud words.
- Clothing noise: fabric or jewellery brushing lavaliers or stands.
- HVAC rumble: low hum that meters barely show but ears catch.
- Headphone bleed: one person's monitor leaking into another mic.
The recording route changes the check, not the standard. Customers can record with Riverside, Zoom, StreamYard, or cameras in a room, and each route needs its own separate-track verification before the guest arrives. Confirm the platform is saving one file per speaker, because a mixed stereo file removes your ability to fix a quiet guest.
Watch this walkthrough before your next session if you want to hear how gain, placement, and monitoring interact in practice.
Loudness and the master mix
In post, edit each isolated track on its own. Apply high-pass filtering only where rumble needs it, use moderate compression to tame level swings, and measure the finished programme with an integrated loudness meter. The EBU R 128 recommendation sets a reference target of -23 LUFS, with a permitted ±1 LU tolerance in situations where the target cannot be achieved practically, and recommends checking maximum true peak rather than relying only on sample peaks.
Platform targets for web delivery may differ from that reference. Preserve one clean master mix and create platform-specific versions from it, so you're never re-editing the episode to fix loudness.
Three failures cause most unfixable audio. Relying on camera scratch audio as your recording, placing microphones too far from speakers, and normalizing each voice separately without checking the combined mix. The third one surprises people, because each track can measure fine alone while the summed mix pumps, clips, or buries whoever speaks second. Always judge the mix as your listener hears it.
Lighting Your Hosts and Guests Consistently
Multi-camera lighting has one problem single-camera shows never meet. Each angle sees shadows differently. A key light that flatters the host's close-up can flatten the guest's, and a background that looks warm in the wide can look orange in a single. Start from this setup, then verify it camera by camera.
| Light | Placement | Starting setting | Watch for |
|---|---|---|---|
| Key light | 30 to 45 degrees off camera axis, slightly above eye level | 5600K daylight source through a softbox or large panel | Harsh shadows under the nose and cheeks |
| Fill light | Opposite side of the key, lower | 1-2 stops below key (about 2:1 to 3:1 ratio) | Flat faces when too strong |
| Hair or back light | Behind and above each guest | Low intensity | Glare on glasses and bald heads |
| Background light | Aimed at wall or set | Below key, same colour temperature | Colour cast that differs between cameras |
The 2:1 to 3:1 ratio between key and fill keeps faces modelled without looking dramatic. Push the fill higher and everyone looks flat and tired. Drop it too low and the shadow side of the face falls apart on the wider angles, where the key reaches less effectively.
The one check that makes three cameras match
Set manual white balance and manual exposure on every camera. Auto settings let each body make its own decisions, so skin tones shift every time you cut. Hold a grey card at each seat, set white balance from it, then compare skin tones across all close-ups on one monitor before anyone sits down to record.
Match the cameras to each other, not to what looks good on whichever monitor you checked first.
Our podcast lighting guide covers fixture choices in more depth, but the matching discipline matters more than the brand on the stand. Two modest panels at the same colour temperature beat four mixed sources fighting each other.
Edge cases worth handling before the guest arrives
Window light changes across an hour. Either block the window fully or record inside a fixed time window, because a slow brightness shift will make your first and last segments impossible to match. Clouds moving mid-sentence are worse, since exposure changes inside a single answer.
Glasses and bald heads catch back light and return it as glare. Lower the hair light's intensity, raise its angle, or move it off the reflective path and check the guest's actual seat, not an empty chair. A warm practical lamp glowing in the background looks inviting in person and throws a colour cast into whichever camera faces it, while the others stay neutral. Either match its colour temperature to your key or switch it off and light the background deliberately.
Check the darkest skin tone and the lightest skin tone in your cast under the same setup. A ratio that flatters one guest can crush detail on another. Adjust fill at the seat that needs it rather than brightening the whole set.
Recording Day Checklist and Test Run
Your sync routine is already proven. Recording day isn't for rebuilding the system. It's for verifying the set in front of you, because power cycles, battery swaps, and yesterday's helpful adjustments undo good settings.
Verify the set in seven steps
- Confirm settings after power-up. Check that every camera, recorder, and switcher still shows the agreed frame rate and timecode, including any body that had a battery swap since setup.
- Record a five-minute test. Each speaker talks at normal and loud volume while you watch the separate track meters for clipping.
- Play the test back on a large screen. A small camera monitor hides problems. Check framing, eyelines, glare, and colour cast on each close-up at the size your audience will see on a television.
- Adjust one thing at a time. Change a light, a gain setting, or a framing, then re-shoot only the shot that failed. Changing three things at once leaves you unsure which fix worked.
- Start the full recording with a clean start marker and run a backup on local SD cards or a second recorder. A switched programme feed alone gives you no recovery if the switcher drops an input.
- Name files by episode, camera, and card as they come off the set. Consistent names let your editor match angles in minutes instead of scrubbing hours of footage.
- Log known faults in one line at the end of the session. A buzzing cable at minute twenty or a camera that restarted once is gold to whoever edits next.
That five-minute test feels slow when a guest is waiting. It's faster than discovering a dead track after they've flown home.
Package the handoff properly
Hand over three things every time. Separate audio tracks per person, every camera card, and the one-line fault note. Clients provide separate audio tracks per person, every camera card, and a one-line note about anything already known to be broken, and that small discipline is what lets an editor start cutting instead of troubleshooting.
- Audio tracks: one file per speaker, unmixed, at the original settings.
- Camera cards: complete, not cherry-picked clips you assume matter.
- Fault note: one honest line, written while you still remember.
A three-camera show is only as good as its weakest recording.
Back up cards before you clear them, and don't format anything until the editor confirms the files open. Storage is cheap. A guest's second visit to re-record a lost episode is not, and it rarely goes as well as the first conversation anyway.
Test before the guest arrives, not while they're making coffee in your studio. The five minutes you spend on playback buys you a calm recording and an editor who can do the job you hired them for.
Choose Your Editing Route Before You Hit Record
Who edits your show should shape how you record it, not the other way round. Decide the route now, because it determines your file naming, your backup habits, and how much sync work you're signing someone up for.
In-house or outside editor
If you've got an in-house editor who can handle multi-camera sync, audio levels, and switching decisions, keep the work inside. Give them the recording day checklist and the handoff package, and they'll build speed on your format episode after episode.
If you don't have that person, an outside editor is the practical route, especially for a weekly show where a slipped edit means a missed publish date. Brief them with three facts. The camera count for your format, the separate per-speaker audio tracks you'll supply, and the fault note from each session. Those three items determine how much sync and cleanup the edit requires, so hiding them only delays the first delivery.
At Pixel Samy Studios, our Studio plan covers multi-cam editing with 2 to 4 camera angles, delivered in 4K, with active-speaker switching, and multi-camera recordings with separate tracks per speaker give our team the most to work with on that plan. It's priced at $299 per episode for 2 to 4 cameras in 4K, with unlimited revisions. Whoever you choose, ask two questions up front. What's the revision policy when a cut doesn't land, and what's the plan when a camera card arrives damaged or missing?
Your next three actions
- Count your cameras against the table and set the camera count your format justifies, using the three-moment test if you're tempted to add one.
- Run the recording day test on a five-minute dummy session with stand-ins at each seat, at normal and loud volume.
- Send the handoff package to your editor, meaning the separate tracks, every camera card, and a short fault note.
A good multi camera podcast setup isn't the one with the most angles. It's the one where every angle has a job, every voice has a clean track, and the person editing can start work the day you record. I'd rather see two cameras, locked sync, and great audio than four cameras and a prayer.
If you'd rather record and hand the rest over, Pixel Samy Studios edits multi-camera podcast episodes with active-speaker switching in 4K, so your wide, singles, and separate speaker tracks come back as a finished episode ready to publish. Send us your next recording with the fault note and camera cards, and we'll handle sync, switching, audio cleanup, and delivery from there.